
2. 第 1 步:启动程序2. Step 1: launch the app
从开始菜单搜索 Screenshot++,或双击桌面上的 Screenshot++ 图标。首次启动会自动建桌面快捷方式、开启开机自启,并打开一次本教程;以后启动直接进主界面。
Search for Screenshot++ in the Start menu, or double-click the Screenshot++ icon on the desktop. The first launch creates the desktop shortcut, enables start-at-sign-in and opens this tutorial once; afterwards it goes straight to the home screen.
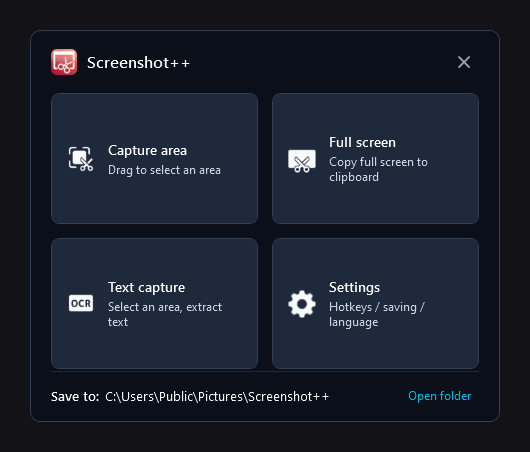
▲ 主界面:四张卡片 + 底部保存目录▲ The home screen: four cards and the save folder at the bottom
四张卡片分别通往哪一步Which step each card starts
| 卡片Card | 点了做什么What it does | 对应Goes with |
|---|---|---|
| Capture area | 进入框选模式,拖出要截的区域Enters selection mode; drag the area you want | 第 2 步Step 2 |
| Full screen | 整屏截图直接进剪贴板,不产生文件Whole screen to the clipboard, no file written | 第 7 页Page 7 |
| Text capture | 框选一块区域并识别其中的文字Select an area and recognise its text | 第 5 步Step 5 |
| Settings | 语言、主题、保存路径、快捷键、关于Language, theme, save path, hotkeys, About | 第 9 页Page 9 |
底部那行字The strip at the bottom
底栏是当前保存目录,默认 C:\Users\用户名\Pictures\Screenshot++。点 Open folder 用资源管理器打开它——第 4 步存好的图就在里面。想换目录见第 9 页。
The strip shows where shots are saved, by default C:\Users\<you>\Pictures\Screenshot++. Open folder opens it in File Explorer, which is where everything from step 4 ends up. Page 9 explains how to change it.
✕ 不是退出:✕ does not quit:
点右上角 ✕ 只是把主界面收进托盘,程序继续在后台响应快捷键——这正是截图工具该有的样子。真要退出用托盘右键菜单的 Exit(第 10 页)。
The ✕ in the corner only hides the window into the notification area so the app keeps answering hotkeys — exactly what a screenshot tool should do. To really stop it, use Exit in the tray menu (page 10).